Bay Area Satsuki Aikokai

Satsuki Azalea Bonsai Club

Category: Meeting Recap Page 1 of 2

Exposed Root Satsuki Azalea Bonsai

On February 27, 2020, Darren Wong demonstrated for members of the Bay Area Satsuki Aikokai a technique for creating exposed root Satsuki azalea bonsai. The materials used for the demo included: Satsuki azalea cuttings, one four inch plastic nursery container, a plastic empty beverage bottle, small size Japanese Kanuma, medium size Japanese Kanuma, Japanese mountain moss (Yamagoke – Dried Japanese Mountain Moss for Surface Root Protection). Tools included: scissors, chopstick, #2 aluminum wire, wire cutters.

Step one was to cut the top off the plastic empty beverage bottle and make several large holes in the bottom of the container. It is best to have a plastic bottle that is narrower at the top and wider at the bottom. This is so the roots will grow within the container and be wider at the bottom than the top. Otherwise, the roots would grow evenly or worst in a reverse taper.

ialis 10 mg euro2000.org, kamagra prezzo visit

Step two, fill the four inch nursery container with medium size Kanuma about half way up. The roots will grow through the bottom holes in the beverage container in to the Kanuma.

Step three, attach the aluminum wire to the bottom of the beverage container. Then insert the beverage container into the four inch nursery container and wrap the wire around the nursery container in order to secure them together.

Step four, prepare the Satsuki azalea cutting by removing all potting soil and bare rooting the plant. Trim some of the foliage, if needed. Do not trim any of the roots.

Step five was to insert the Satsuki azalea cutting roots into the top of the beverage container. Then fill the beverage container with medium Kanuma about ¾ of the way up. Top off the beverage container with small Kanuma. Now fill the remaining portion of the four inch nursery container with the medium Kanuma. Use a chopstick to remove any air pockets in the Kanuma.

Step six was to place the Japanese mountain moss on top of the small Kanuma layer at the top of the beverage container to protect the root surface.

Finally, water thoroughly.

Repotting Satsuki Azalea Bonsai

On February 27, 2020, club president Bob Gould led the discussion on repotting Satsuki azalea bonsai. Bob brought to the monthly meeting of the Bay Area Satsuki Aikokai a number of Satsuki azaleas that were donated to the GSBF Bonsai Garden at Lake Merritt in Oakland, California. These were neglected plants in various containers with potting soil. The task at hand was to eliminate the potting soil and repot the plants in 100% Kanuma bonsai aggregate.

The immediate undertaking was to eliminate the potting soil and bare root the azalea plants. The potting soil had broken down and causing problems for the plants. The use of chopsticks to pick away at the potting soil was found to be most useful for this task. Once the potting soil was removed, then the plants could be wired in to containers on hand and filled with 100% Kanuma (a preferred bonsai aggregate for Sutsuki azaleas).

comprar cialis generico https://farmaciaespana247.com/, levitra 10 precio en farmacias FarmaciaEspana247

Japanese Kanuma is the perfect soil for acid loving plants. The most common plant to utilize Kanuma for bonsai is azaleas. Azaleas along with Camellias, Gardenias and other acid loving bonsai can be potting into pure Kanuma. Kanuma is a very light volcanic rock.

The evening produced a number of repotted Satsuki azalea bonsai. Time will tell whether or not these plants will be developed in to bonsai.

BASA Meeting Notes from 9/27/2018 by Candace Key

Mesuki:
• Reduction of foliage so sun can get to the interior of branches to encourage growth
• At this point at the end of growing season the trees will be bushy, so to make sure the interior of the branches do not get shaded out and the growth stunted. You do mesuki!!!!
• You must keep enough foliage on the branches though to ensure the nutrient/water flow, and the tree is still getting energy through photosynthesis.
• Take off downward pointing branches, but not upward pointing ones – they will be wired, now or in the winter. Always have some extra branches in case some are broken during wiring.

Preparing for winter –
• Trees should be fertilized now using 5-5-5.
• Darren’s method – take off 1/4 soil from the top, add fresh soil, add 5/5/5/fertilizer in tea bags and cover with yamagoki. This keeps the fertilizer moist and the nutrients more available to the roots. Leave on until February.
• Fish emulsion is also a good fertilizer, but if given during April or May, flowers will fade more quickly when it blooms

Start thinking about show trees:
• Trees you are planning to show can be wired now
• Put more work into the trees you are planning to show
• If trees are slow to bloom stress them a little to encourage the buds to open. Withholding water – to some extent – stresses trees and is a useful technique as well

Struggling and sick trees:
• Repotting now was discouraged except in the most extreme cases
• Emergency repotting – Remove just one inch of roots from the bottom and almost nothing from the sides. Disturb roots as little as possible and do a proper repot of the tree in March.
• Several trees seemed to be suffering from root problems, likely caused by too much water, possibly combined with too much heat (Trees stop taking up water when pot temperature reaches +/- 85º)
• Subdue and Banrot were recommended as treatment – regular strength, 2 applications 2 weeks apart.
• If root issues persist alternate Subdue with Banrot for best results, but do not use continuously because they will kill beneficial bacteria (see below)
• Root treatments can kill all bacteria and beneficial mycorrhizae. Hydroguard Bacillus Root Inoculant and Great White Shark Mycorrhizae are good brands for repopulation of beneficial organisms – available on line or local stores selling to the cannabis cultivators
• Hormex is recommended for root growth and trees in distress. Darren uses it after repotting a tree for about one month after. 10 drops per gallon

A few other pointers for repotting satsuki azaleas:
• Darren now uses a mix of medium and small size Kanuma in repotting small to medium sized trees. He finds that water flows through the soil better when the sizes are combined rather than separated in layers.
• Before repotting, thoroughly clean the inside of the pot with disinfectant, such as Physan 20. Rinse well and then let dry in the sun for several days.
• You can also use a 50 % solution of hydrogen peroxide and water to disinfect your pots.
• Always rinse the pot out well and let dry for a day or two. This is especially important if the pot had a sick tree in it prior.

Meeting/Demonstration February 22, 2018 – Tool Maintenance

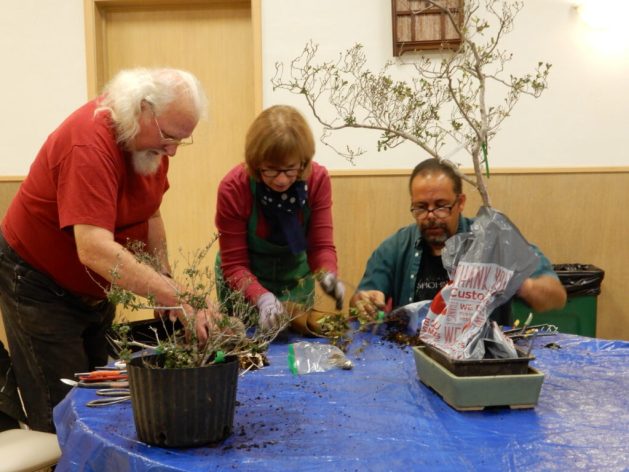
Gordon Deeg presented a program on tool maintenance at the last BASA meeting that was informative and comprehensive. This subject is rarely discussed, and his approach was lively and entertaining. He made what is a dry and technical subject both accessible and memorable.

Gordon brought along a series of stones and tools that make sharpening and maintaining tools an easier task, and emphasized the point that sharp, clean, well maintained tools are absolutely required to be able to do the work we need to do on our bonsai plants with a minimum of damage and exposure to disease, poor healing and scarring, The stones, he said, can be types that are lubricated with oil, water or diamond-impregnated surfaces that do not require lubrication. The coarse ones must be used first when the cutting edges are damaged or have been allowed to get very dull, followed by finer, then very fine ones. He noted that the grit value of a sharpening stone or surface is expressed in numbers that go from low, which are coarser, to high, which are finer, to very high, which are essentially grits used for polishing and refining a cutting surface so that the edge you work to create can last much longer and require less sharpening in the future. This means not less frequent sharpening, but less effort and time for the sharpening that should be done very frequently. A coarse grit would be rated at 600-800, used for re-establishing or correcting a damaged edge; a sharpening surface is rated at 1100 to 1600; a refining and polishing surface is rated at 1800-2200 for the tools commonly used in bonsai.

Gordon noted that many, maybe most bonsai professionals maintain their tools by quickly sharpening before each day’s use. In this way the tools always work well and last much longer. They become an advantage that saves time and effort. Once a good edge has been established, maintaining the blade becomes a matter of a few strokes on a fine or very fine surface, which only takes a minute or so.

The diamond surfaces were of special interest because they can be shaped to fit the cutting surface, so there are spindle shapes and graduated wave forms to fit any curved, hooked, or odd-shaped cutting surface. It was noted that the company, American Bonsai has two sizes of graduated funnel-shaped diamond sharpeners that are very useful for curved cutters.

American Bonsai Tool & Supply Co. – High Quality Stainless Steel Bonsai Tools & Supplies – American Bonsai offers high quality stainless steel tools and supplies for bonsai enthusiasts.

The process of sharpening causes microscopic metal filings to accumulate on the sharpener’s surface, reducing its effectiveness, dulling it, so to speak. It is this that the water or oil is for, because it floats most of the filings above the surface of the sharpener so they can be brushed or wiped away, which should be done frequently, even on dry sharpeners like diamond. Gordon even had a stone to grind across the sharpening stones, to renew the surface and flatten them out, because the act of sharpening tends to wear the middle parts of the stones and warp the surface.

There was more information given about how to use a hammer to correct the hinge point of a tool that binds or has become too loose, how to correct a tool whose blades don’t quite meet any more, and other small wonders of tool wizardry. Now I think he should present this vital and informative program every year. If he gives it again, be sure not to miss it.

–Chris Ross

Our September meeting provided a great “welcome back from Summer” program on pest and disease control for our satsuki azaleas, and suggestions for timely and appropriate feeding. Bob Gould, who so humbly insists he is not an expert, led our discussion and imparted tons of expert information. He brought several products to illustrate his preferred products and there was a lively back and forth with questions and suggestions from members. Darren Wong, who studies with Mr. Suisho Nakayama in Japan and imports trees as well offered his experience in repotting and treating trees that have been brought to this country bare-rooted. His methods were similar to Bob’s and we all learned from the exchange of information between our two club experts (yes, you are Bob!)

Bob Gould led the pest and disease control discussion

Darren Wong discussed pest and disease control

BASA members received specific pest and disease control assistance

The meeting was so chock full of tidbits and tricks for keeping our trees healthy that it was difficult to keep up with the rapid-fire comments. To the best of our knowledge the following accurately represents what was said. Where specific advice was given I have attributed it to either Bob Gould-BG or Darren Wong-DW.

Bugs – Fungus – Disease

Merit 0.5 is a good systemic insecticide. Bob alternates Merit, which is in powder form, with a spray during the year. He treats about 3 times a year and DW twice a year in the Spring and Fall. Because Merit is dry it can be mixed in tea bags along with fertilizer and placed on the soil to be watered in for a slow release.

Cleary 3336 is the fungicide Bob uses, usually after the Spring bloom in June.

There are also some mystery pellets that were mentioned with a Japanese name and source. If you can locate it with these clues, use 1 teaspoon for a 12-inch pot?

Thrips can be a very big problem for azaleas and quickly kill them. They need to be controlled with a systemic treatment like Merit 0.5 or Bayer Advanced Rose and Flower 2 in 1 Systemic. The Bayer product contains the Merit chemical and also has some fertilizer in it.

Root rot is a huge killer for azaleas since it is so easy to overwater them. Watch your watering very carefully and wait to water until the soil is a bit dry, not just the moss on top. Subdue is the treatment for root rot. It is difficult to locate, but takes only a very small amount to be effective, used every two weeks until improvement is evident. Members may want to share the cost of this, as well as bags of Merit to reduce the cost and waste.

Fertilizing is much more of a “touchy feely” thing, as literally, Bob decides when to fertilize by the feel of his trees. If the leaves are not firm and cool to his touch he gets busy with the fertilizer. There are many good products on the market, but Bob and Darren agree that keeping the numbers low, 5-5-5, is best for our purposes of creating bonsai. This proportion provides beneficial minerals, but doesn’t encourage crazy growth. Whitney Farms and Dr. Earth were mentioned as good organic products. Chris Ross suggested Dr. Earth’s Rhododendron mix which contains good micro minerals for azaleas. Don Meeker mentioned that in colder climates a 0-5-5 might be preferred to keep new growth down during the coldest months, but in our climate, we are fine with the higher nitrogen content.

One of Darren’s favorite fertilizers is Greenall FST which has iron, magnesium, sulfur. He uses it once a year since most fertilizers to not provide the micro-minerals and nutrients that this product does.

If you have young azaleas and just want faster growth to build a big trunk and branches a chemical fertilizer will get you there faster – as Darren suggests.

The most important part of fertilizing is to JUST DO IT! Being consistent with whichever product you choose will be the most effective way to insure strong growth and flowering for your trees. October is the most important time to fertilize since food for the trees now will provide strength for the Spring push of growth.

Lastly Darren provided his favorite method of wintering over his trees:

  • Remove weeds and seeds.
  • Add a fresh top layer to the soil.
  • Fill tea bags with two or three tablespoons of your favorite fertilizer and place here and there on the soil.
  • Cover with Yamagoki moss (Japanese mountain moss) – putting the moss over the fertilizer keeps it moist and allows it to release the nutrients more fully, leave this on through the Fall and Winter.

Thank you Bob and Darren for a fine presentation. We greatly appreciate you sharing your wealth of knowledge and experience.   — Candace Key

A good online source for these and other products is Do My Own Pest Control at www.domyownpestcontrol.com/


Bonsai Display by Jonas Dupuich

BONSAI DISPLAY BY JONAS DUPUICH

Our Bay Area Satsuki Azalea club meeting at the Lake Merritt Garden Center in Oakland, on March 23, 2017 was especially interesting and well-attended. The guest speaker was Jonas Dupuich, who brought along a variety of trees and display stands and an extensive knowledge of the often subtle but decisive art of display. Jonas, a founding member of BASA, began his presentation by discussing the different ways azaleas are shown: as purely flower displays, as bonsai with or without some flowers, and as deciduous bare trees so that the development of the structure is paramount. He also provided an excellent handout itemizing how to prepare our trees for exhibit – many reminders that all of us can use at show time.

 The interactive presentation began with a discussion of the display stands which ranged from formal to informal, from light colored finishes to darker ones, and from tall or short to flat trays. Jonas explained the uses and placement of these and the other elements of a display, such as secondary trees, accent plants, and scrolls to create a harmonious presentation. Members of the club were called on to express opinions and preferences, and then the somewhat loose set of rules and conventions that govern the art of display were applied to the results to demonstrate how to optimize the final result.

It was of interest to note that many of the “rules” seemed to be principles that a person with an education in design, or one of great sensitivity and some experience, would probably choose to follow automatically. For example, large, strong trees were shown to look their best in the formal style of presentation: larger stands of darker finish, rectangular rather than square shapes, straighter lines, simpler design and uncomplicated appearance. Of course, the opposite was demonstrated to be true as well: more delicate trees looked best on stands of lighter colors, curved legs, oval or round or more square shapes.

 Once a tree was properly set, Jonas added accent plants and scrolls that harmonized in color, size and tone, and that accurately suggested the season and geographical area that the artist wished to depict.

 The presentation by Jonas was informative and well-paced, with handouts to read and plenty of trees and stands to demonstrate, and he also used the trees and pots and ideas that members brought in the process. This high quality of presentation and thorough approach can always be expected from him, and it was a pleasure to participate.

– Chris Ross


Approach Grafting by Darren Wong

Photo depicts nails above and below grafted branch, sealed with cut paste.

Photo depicts direction of grafted branch and location on trunk.

Photo of Darren Wong, Mike Mello and Marcia Cozens as Darren works on Marcia’s Satsuki azalea bonsai.

On February 23, 2017, at the Bay Area Satsuki Aikokai club meeting, Darren Wong gave the members a demonstration on “approach grafting” of Satsuki azalea bonsai. Approach grafting is the use of two live branches and fusing them together. Darren used a couple of Satsuki azalea bonsai that members brought to the meeting for the purpose of showing how to approach graft. Some preparation was taken in the first case, that was to lightly wire a long branch in the direction of the second branch or trunk. In this case, Darren could easily bend the longer and thinner branch across the trunk. This long, thin branch was the first-year growth and very flexible. He was going to approach graft or attach the longer branch to the trunk. The trunk being thicker than the longer branch. With approach grafting both branches or branch-trunk combination is being fed by the continued flow of water. Approach grafting provides a good and reliable method for a successful union.

The best time for approach grafting is when the bonsai is in the growing season, like February and March.

The cambium plays an important role in approach grafting like other methods of grafting. This is the union that must meet in order to obtain a successful graft.

Darren first determined where on the trunk he needed to add a new branch. He placed the long, thin branch across the trunk and found the location on the trunk to place a new branch. He proceeded to use a sharp grafting knife to make a ¼ inch long “v” shaped cut in the trunk. The “v” is cut length-wise in the direction you want the new branch to grow. The depth of the cut was approximately ½ the thickness of the long, thin branch. The cut was not very deep. Darren pointed out the cambium as green, lying just under the outer bark. This information tells you the branch or trunk is live and capable of taking the approach graft. He used a woodworker’s carving knife to round out the “v” cut for a more natural fitting.

He then placed the long, thin branch into the cut area to ensure a good fit. Darren then used his grafting knife and fingernail to lightly scrape the bark away on the long, thin branch to expose the green cambium layer. This was done on both sides of the long, thin branch so that the cambium of both branch and trunk touched one another. This will help the grafting take faster.

Darren saw that the fit was good. He then used a small nail with rubber washer (imported from Japan) and hammered it in place to hold down the long, thin branch and placing pressure on the union. Another small nail was used to ensure an adequate amount of pressure was placed on the union of branch and trunk. The nails are positioned one above and one below the branch, hammered into the trunk (see photo).

Darren then applied cut paste, rolling the cut paste in his palms to measure about ¼ inch or more in length, and applied the cut paste to all exposed areas of the union. This step is important to seal in moisture and assist in healing the wound.

Approach grafting another member’s bonsai followed the same steps above. Darren cautioned about watering and handling the bonsai afterwards so as not to disturb the approach graft. He did some light cutting of other branches and tips, but do not cut the tip or branch used in the approach graft. The approach graft will be successful when you observe the long, thin branch grow in size. Darren usually leaves the approach graft alone for two years to ensure it takes and is healthy. At that time, you cut at the base where the grafted branch first enters the trunk leaving the new branch.


Page 1 of 2